本文将会介绍如何使用CLion查看EOS源码。
EOS的智能合约基于C++开发,官方在github上提供了很多合约样例,地址: https://github.com/EOSIO/eos/tree/master/contracts
直接查看这些样例的源码无疑是学习合约开发最快速的方法,这时我们需要一个合适的IDE工具,尤其是IDE的代码追查功能,能够大大提高阅读源码的效率,在这推荐大家使用CLion。
Clion简介
CLion是一款专为开发C及C++所设计的跨平台IDE。由大名鼎鼎的JetBrains公司开发,以IntelliJ为基础设计,支持Linux、macOS及Windows平台。
下载地址:https://www.jetbrains.com/clion/download/
CLion需要收费,初次下载有30天的免费试用期。
编译EOS源码
在使用CLion之前,需要先编译eos源码,这样才能在导入源码之后使用IDE的代码追查功能。
eos提供了自动编译脚本,一键傻瓜式操作。下载源码后,进入eos目录,运行自动编译脚本。
cd eos
./eosio_build.sh
编译过程中会根据当前系统环境,下载相关依赖,以MacOS为例,有如下依赖。
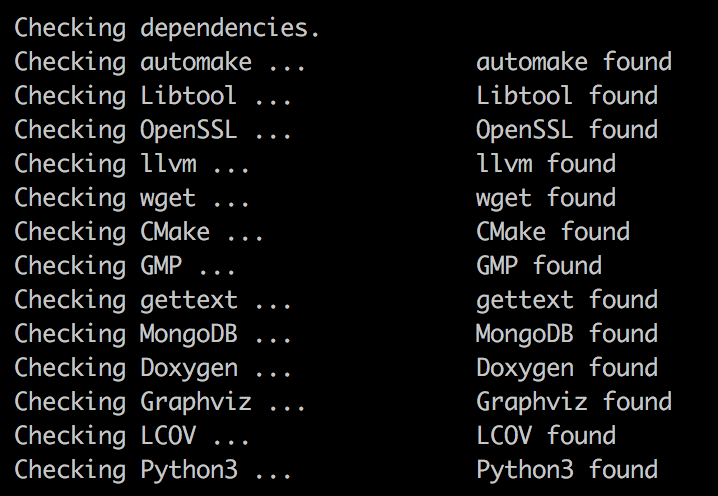
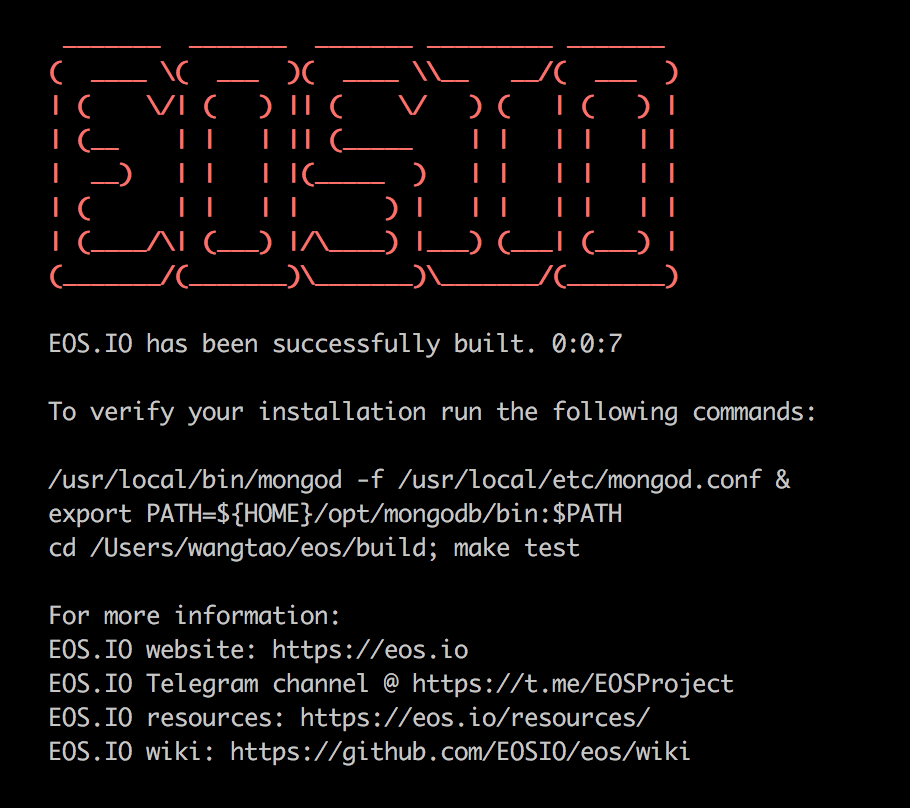
如果这些依赖不存在,会自动下载并且安装,编译成功后会显示下面的内容。
安装生成文件
cd build
sudo make install
导入EOS源码到CLion
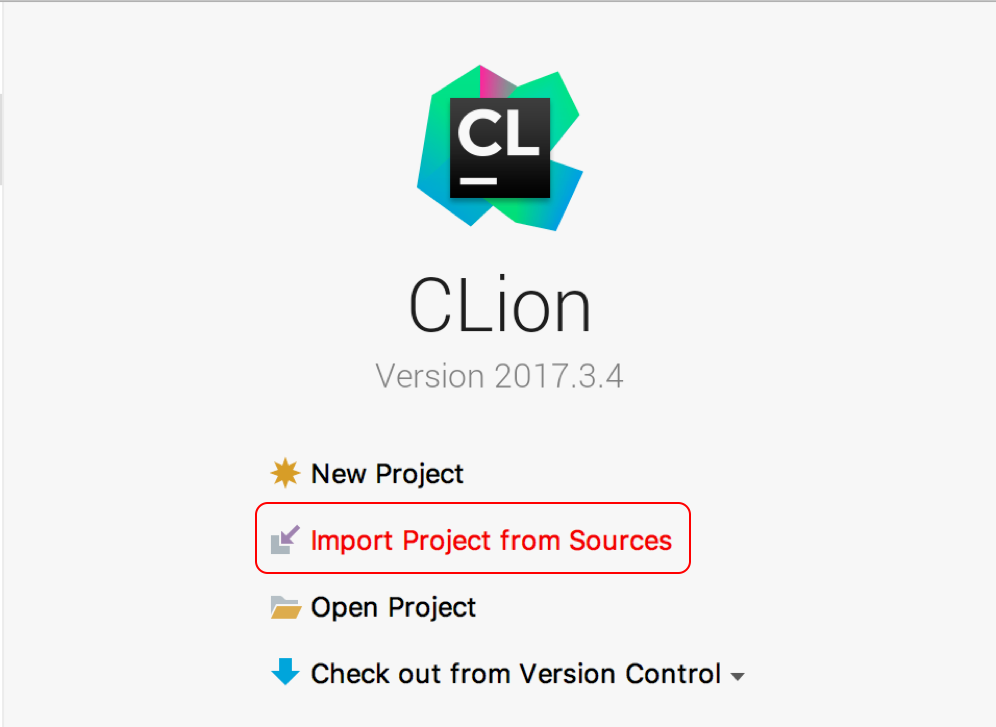
启动CLion,选择Import Project from Sources导入eos目录中的内容
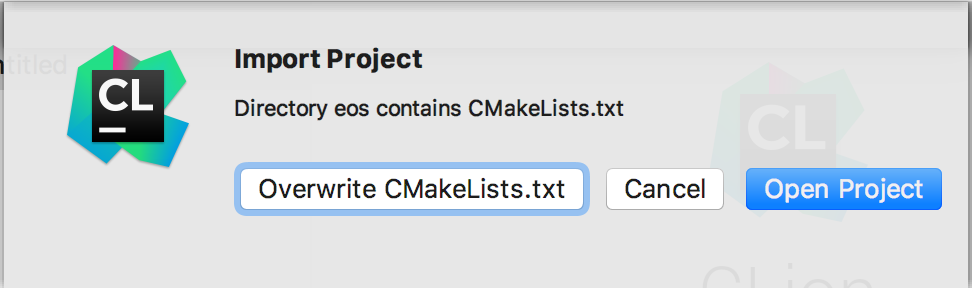
导入时,会提示eos目录下已有CMakeList.txt文件,点击 Open Project按钮。
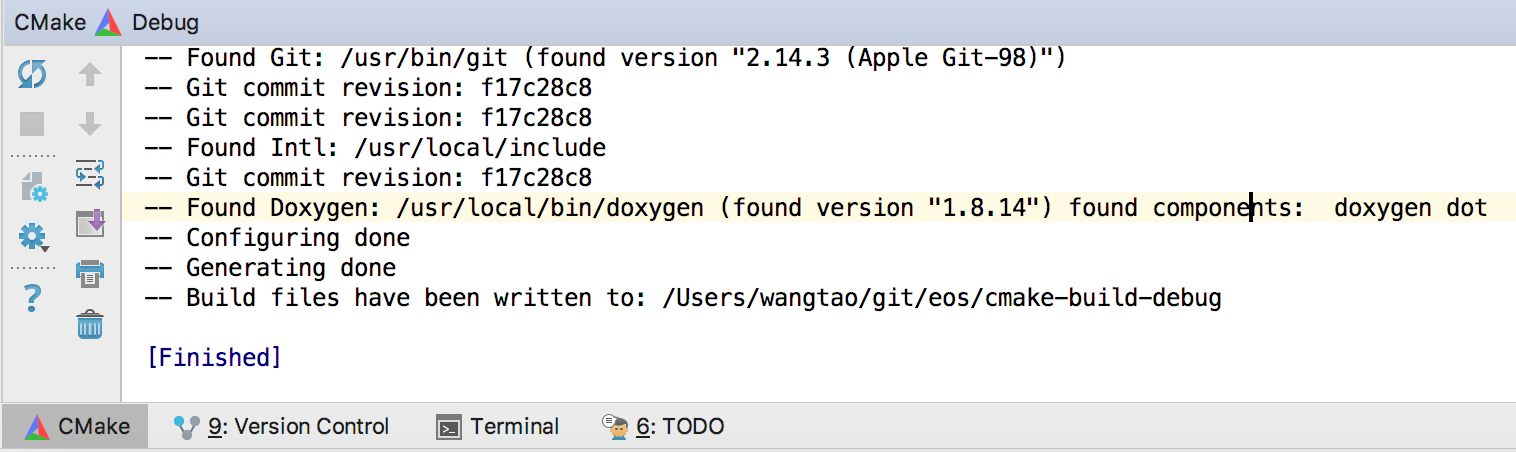
导入后,CLion需要根据CmakeLists.txt文件编译整个项目,在CMake窗口会显示当前的编译进度,如果编译完成后,能够如下图显示[Finished]并且没有报任何错误,那么恭喜你导入成功,接下来就可以愉快的阅读源码了。
常见问题
系统:MacOS 10.13.3
- Failed to find Gettext libintl (missing: Intl_INCLUDE_DIR)
解决方案brew unlink gettext && brew link --force gettext find /usr -name libintl* -print 2>/dev/null - Unable to find the requested Boost libraries
错误信息:Unable to find the requested Boost libraries. Unable to find the Boost header files. Please set BOOST_ROOT to the root directory containing Boost or BOOST_INCLUDEDIR to the directory containing Boost's headers.解决方案
brew uninstall boost
brew install boost
进入CLion,重新编译项目。在项目名称上右键,选择“Reload CMake Project”
- Could not find a package configuration file provided by “LLVM”.
错误信息:Could not find a package configuration file provided by "LLVM" (requested version 4.0) with any of the following names: LLVMConfig.cmake llvm-config.cmake Add the installation prefix of "LLVM" to CMAKE_PREFIX_PATH or set "LLVM_DIR" to a directory containing one of the above files. If "LLVM" provides a separate development package or SDK, be sure it has been installed.解决方案: 首先确保已经安装了llvm,通过下面的命令确认llvm版本信息。
brew info llvm如果已经正确安装,打开CLion的设置页面(command + ,),找到cmake的环境配置。
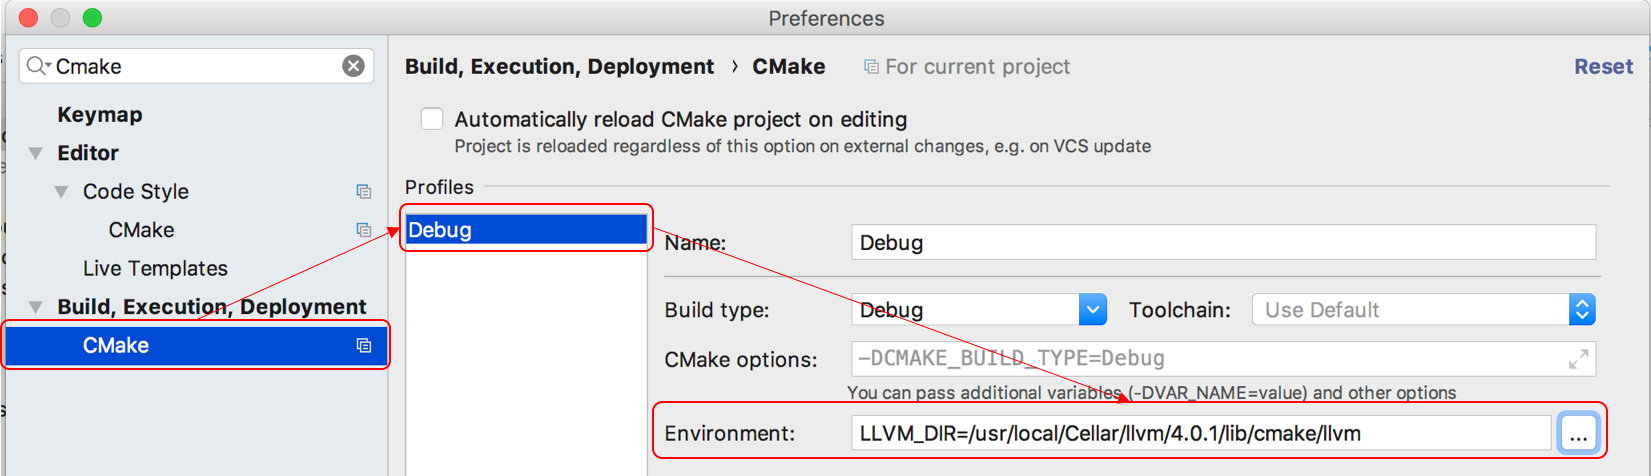
在Environment中指定LLVM_DIR,对应llvm的本地路径,例如: LLVM_DIR=/usr/local/Cellar/llvm/4.0.1/lib/cmake/llvm
设置完成后重新编译项目。
转载自:Tao's Blog
版权属于:区块链中文技术社区 / 转载原创者
本文链接:https://www.bcskill.com/index.php/archives/343.html
相关技术文章仅限于相关区块链底层技术研究,禁止用于非法用途,后果自负!本站严格遵守一切相关法律政策!